
Unlock the Secret to Transforming Your Life with This Product!
As new parents, ensuring the health and safety of your infant becomes your top priority. One of the essential practices in maintaining that safety is through proper bottle sterilization. With countless options available, navigating the world of infant care can be overwhelming. However, understanding the significance of bottle sterilization can ease parental anxiety and promote your baby's well-being. The right sterilization method can dramatically reduce the risk of harmful bacteria and viruses that could potentially jeopardize your child's health, making it a vital aspect of your daily routine. In this article, we will explore the benefits of using a bottle sterilizer, how it works, and why it should be an indispensable tool in your parenting arsenal.
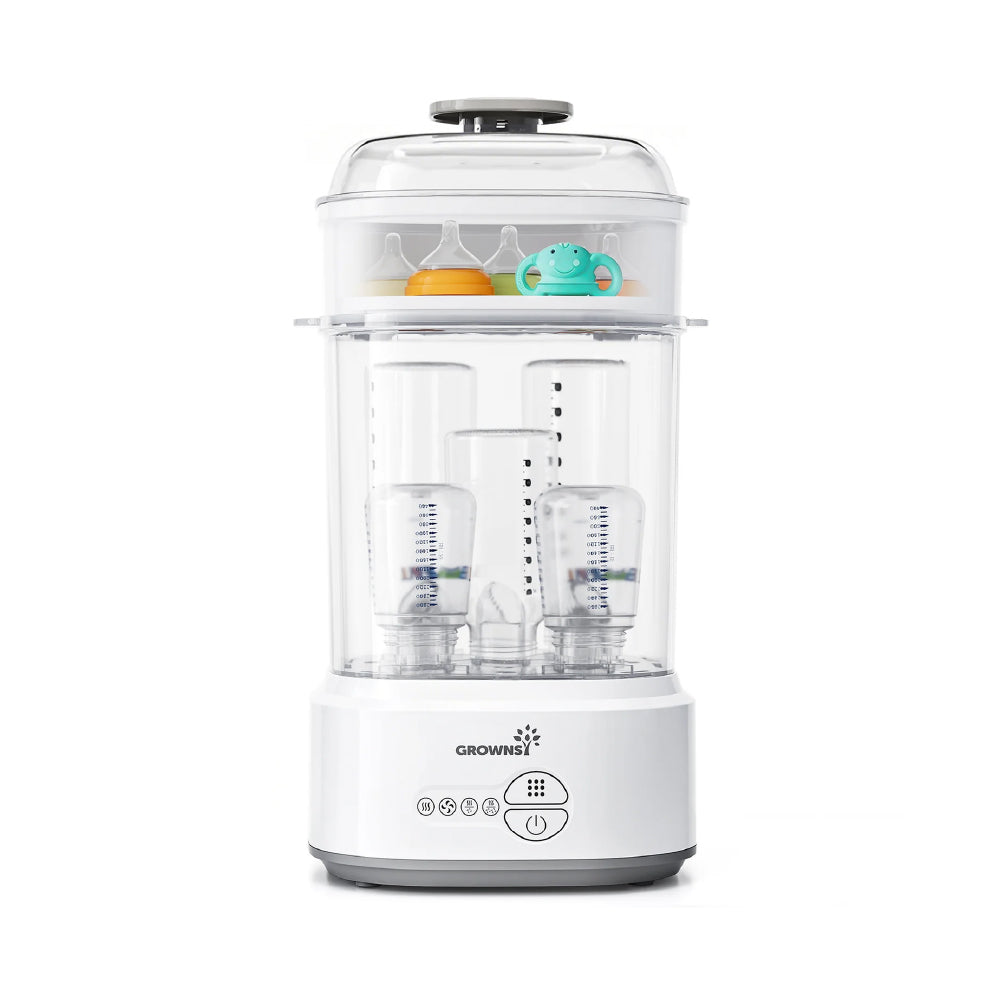
Understanding the First Years Bottle Sterilizer
A bottle sterilizer is a device designed to eliminate germs and bacteria from baby bottles, pacifiers, and other feeding accessories. The technology behind these sterilizers primarily revolves around steam and chemical methods. Steam sterilization is one of the most effective methods, utilizing high-temperature steam to kill 99.9% of harmful microorganisms. This process typically involves placing the bottles in a chamber filled with steam generated from boiling water. On the other hand, chemical sterilization involves soaking the items in a solution designed to disinfect. Friends of mine, who are also parents, have shared how the steam method not only ensures thorough cleaning but also saves them time, allowing them to focus on other essential tasks. Understanding how these devices operate can empower parents to make informed decisions about their baby's health.
Benefits of Using a Bottle Sterilizer
Using a bottle sterilizer provides numerous health benefits for infants. First and foremost, it significantly reduces the risk of exposure to harmful bacteria and viruses. Infants have underdeveloped immune systems, making them more susceptible to infections. By regularly sterilizing feeding equipment, you can help lower the chances of your baby contracting illnesses. Moreover, knowing that you've taken the necessary precautions to ensure your child's health can provide invaluable peace of mind. For instance, a friend recounted how the simple act of sterilizing bottles after each use made her feel more in control during the chaotic early days of motherhood. This sense of security is essential for new parents, allowing them to enjoy their time with their little ones without constant worry about contamination.
How to Use a Bottle Sterilizer Effectively
To maximize the effectiveness of a bottle sterilizer, it’s crucial to know how to use it properly. Start by thoroughly washing all bottles, nipples, and accessories with soap and water. Rinse them well to remove any soap residue. Next, place the items in the sterilizer according to the manufacturer's instructions. Typically, you'll need to add water to the sterilizer's chamber, insert the bottles, and then close the lid securely. Activate the sterilization cycle, which usually takes between 5 to 15 minutes, depending on the model. After the cycle, allow everything to cool before handling. It's important to clean the sterilizer regularly to avoid any buildup of bacteria inside the device itself. Common mistakes include overcrowding the sterilizer and not allowing items to dry completely, which can hinder the sterilization process. By following these steps and avoiding pitfalls, you can ensure that your child's feeding equipment is as safe as possible.
Comparison with Other Sterilization Methods
When considering sterilization methods, it’s essential to compare the bottle sterilizer with other options such as boiling, microwave sterilization, and chemical solutions. Boiling is a traditional method that requires submerging bottles in water for at least five minutes. While effective, it can be time-consuming and may lead to bottle deformation if not monitored closely. Microwave sterilization is a quicker alternative, utilizing steam generated in a microwave-safe container. However, it can sometimes result in uneven sterilization if not used correctly. Chemical sterilization, while convenient, often requires thorough rinsing afterwards to remove chemical traces, which can be a concern for some parents. Each method has its pros and cons, but many parents, including some of my friends, prefer using an electric bottle sterilizer for its ease of use and reliability. Ultimately, the choice will depend on your lifestyle and preferences.
Enhancing Infant Health Through Proper Sterilization
In conclusion, understanding the importance of bottle sterilization can greatly enhance the health and safety of your infant. The first years bottle sterilizer offers a reliable solution to ensure that feeding equipment remains free from harmful germs and bacteria. By incorporating this product into your parenting routine, you not only protect your child's health but also gain invaluable peace of mind. As you navigate the exciting journey of parenthood, consider the benefits of adopting a bottle sterilizer—it could very well transform your daily routine and enhance your experience as a new parent.